

There are plenty of articles and tutorials online on how to texture skin well in Substance Painter, and there’s no shortage of techniques, from scanned textures to a more manual, procedural approach where you build the skin from scratch.
In this article, we tackle the same topic with a small twist: darker skin tones.
By comparing how we created a light and a dark skin tone, you’ll still see every core step of procedural skin texturing, along with the reasoning behind each one.
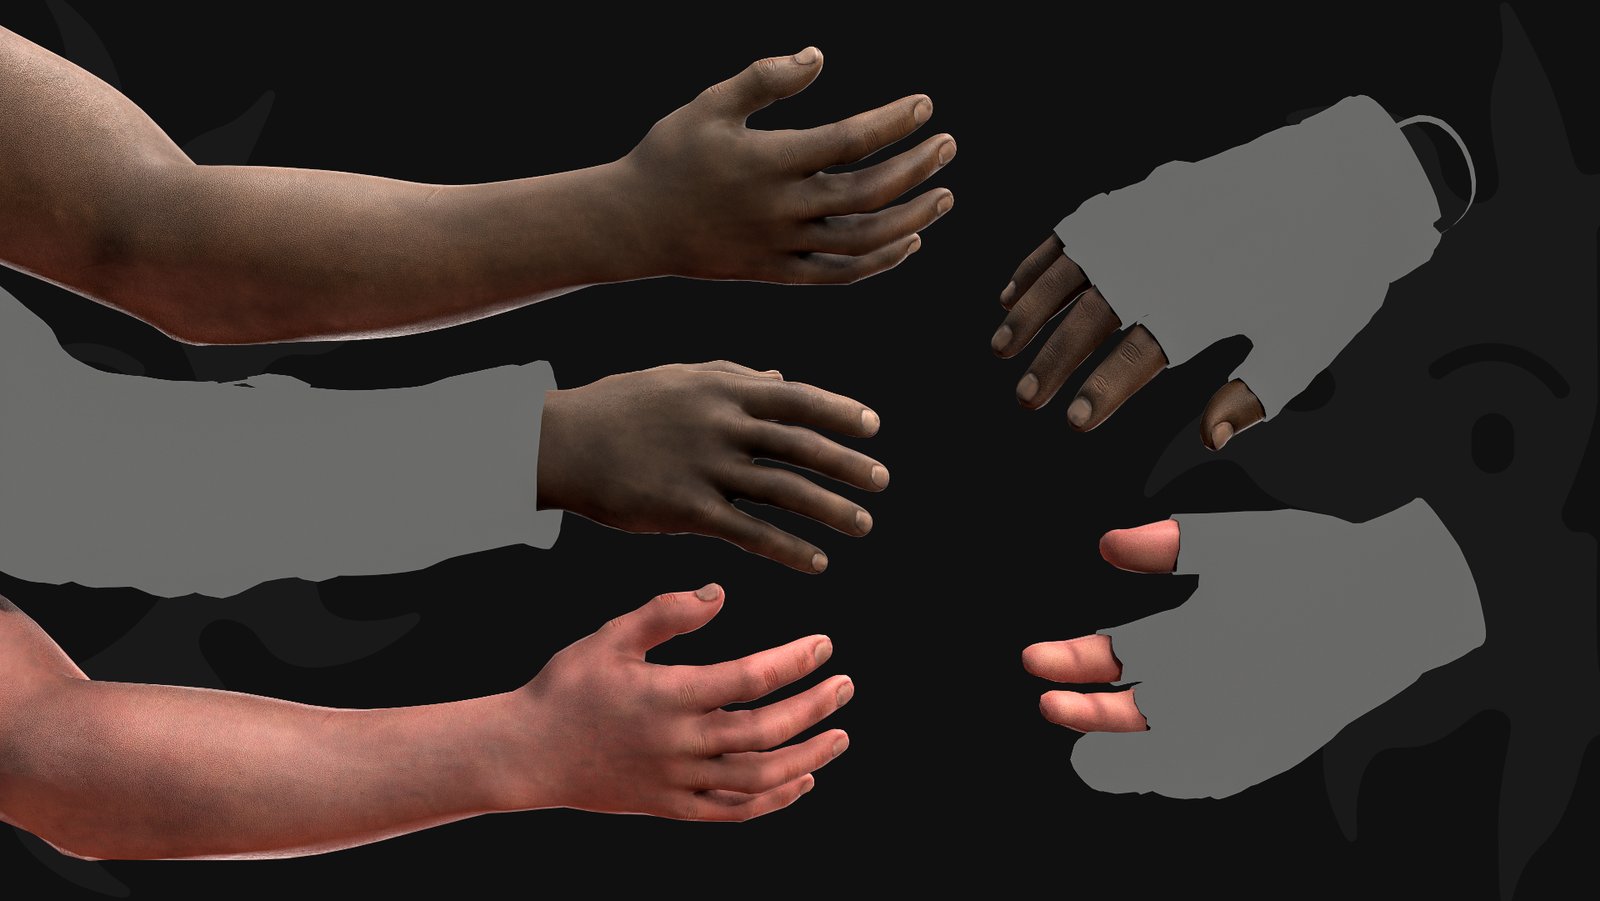
THE GOAL
For our first product release, we set out to make something high-quality that also offered enough choice and variety to suit as many needs as possible.
That’s why, when we built our first FPS Arms Modular Pack, we included six pieces, each with at least two texture variants, including two different skin tones.
At first glance, the two might seem worlds apart, but the reasoning behind them is actually the same.
What we were aiming for: young skin with a few imperfections, some moles and blemishes, clearly visible veins, and the natural marks of the epidermis.
THE KEY STEPS
One way to create realistic skin is to paint it by hand, layer by layer.
From here on, we’ll show how we built up the skin’s sublayers procedurally, starting with painting the various tones that make up its color and ending with the pore texture and the visible surface details.
Base color layer
The skin color foundation every following layer is built on.
Temperature zones
Red for vascularised areas, blue for cooler shadowed ones, yellow for raised, brighter ones.
Small and big veins
Follow human anatomy, painting veins of varying size where they read most.
Skin tone definition
The epidermis, outermost layer, covering all the others and setting the skin tone.
Color variations
Procedural hue variation keeps the skin interesting rather than flat.
Dirty pass and surface details
Blemishes, moles, scars and cuts, painted with symmetry off so nothing looks manufactured.
Lighter spots
Highlights on raised areas and where bones or tendons sit close to the surface.
Pore texture and roughness
Pores through the normal and roughness channels. Skin is never uniform, and variation is what sells it.
DIFFERENCES AND COMMON DETAILS
As mentioned, the differences between the two variants aren’t huge, but they’re essential to getting the material right.
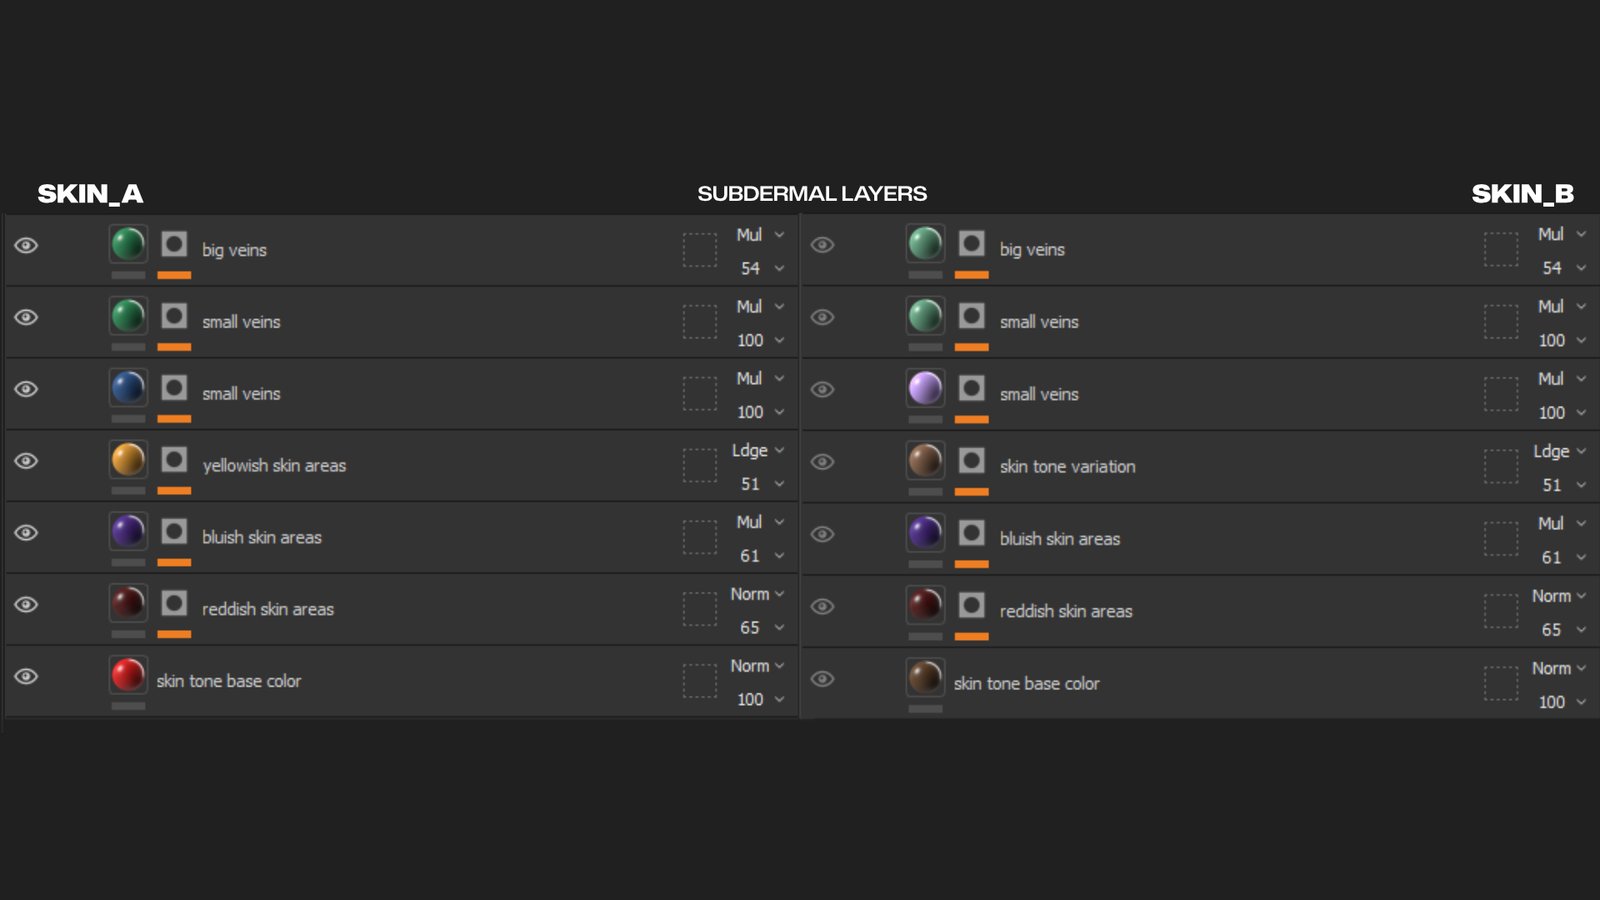
Subdermal
The main difference in this first sublayer is the base color, red for one variant and brown for the other, plus the stronger, higher-contrast colors Variant A carries into the layers above.
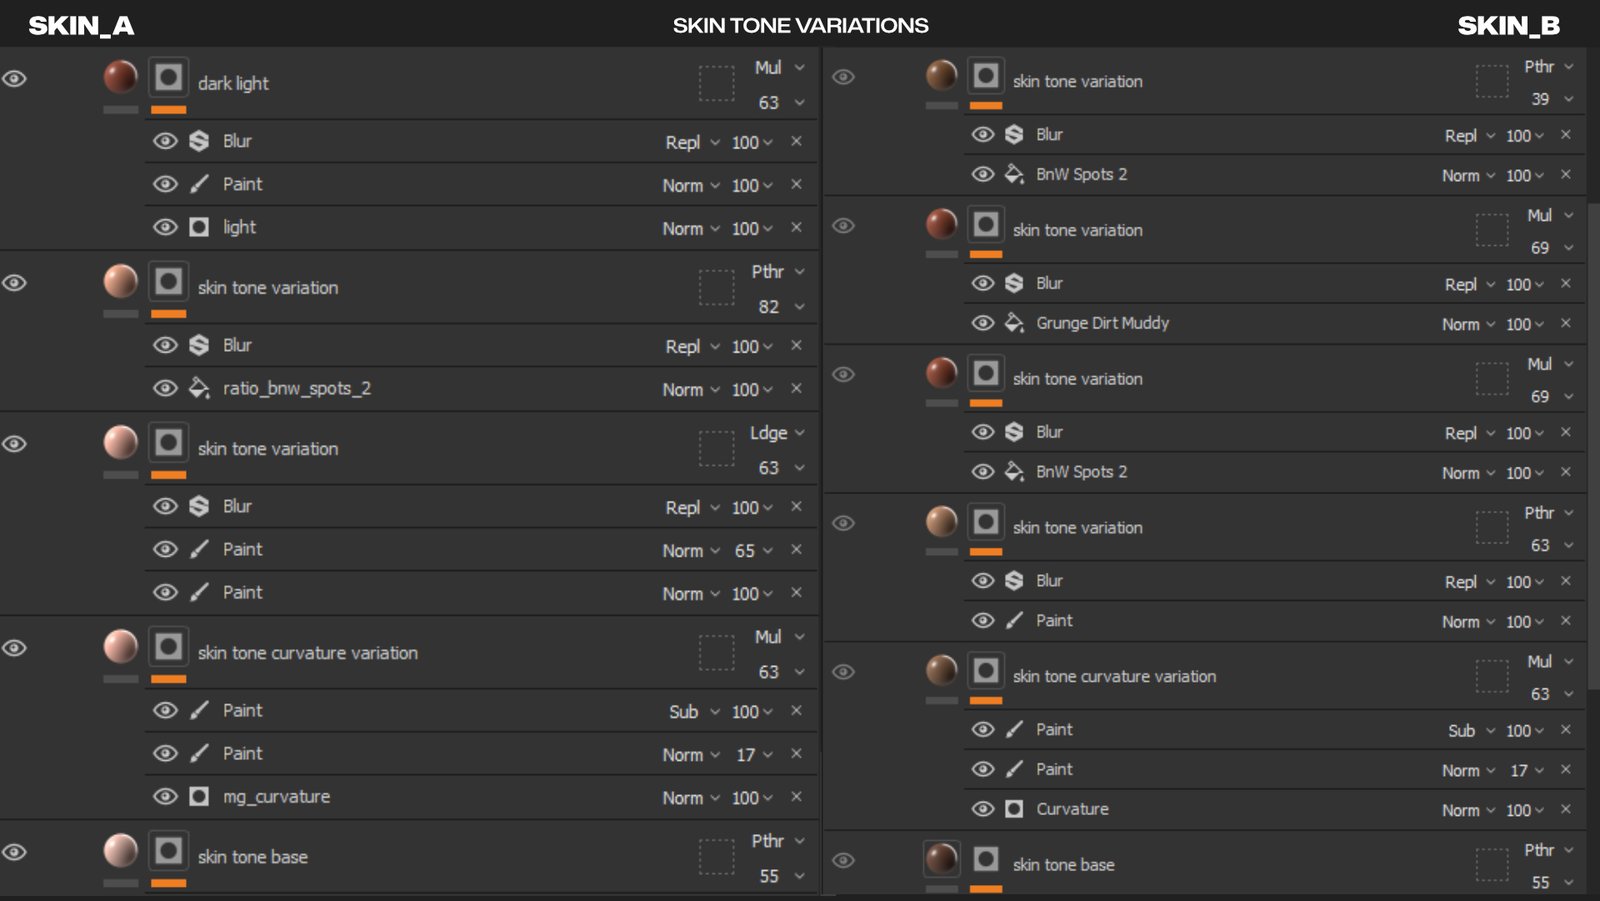
Skin tone variations
Color variations layered over the main tone, in shades that drift slightly away from the neutral pink and the light brown. Experiment with masking techniques and make the most of your baked maps.
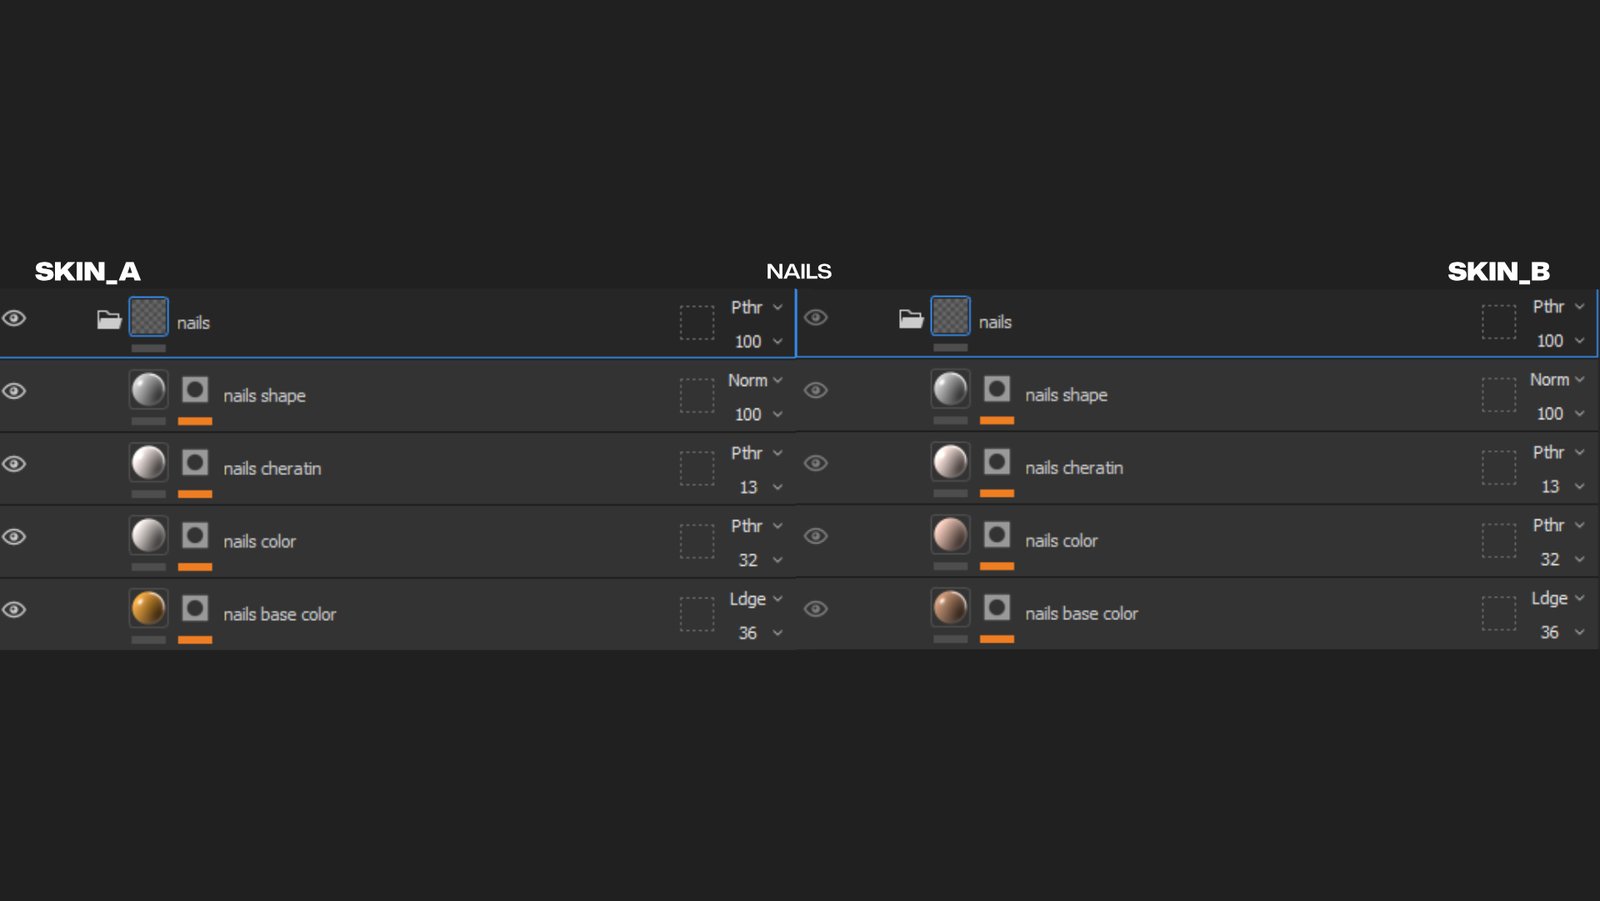
Nails
Only the base layer changes here, the one you see through the translucent nail. The key is balancing nail color against translucency to get the most realistic result.
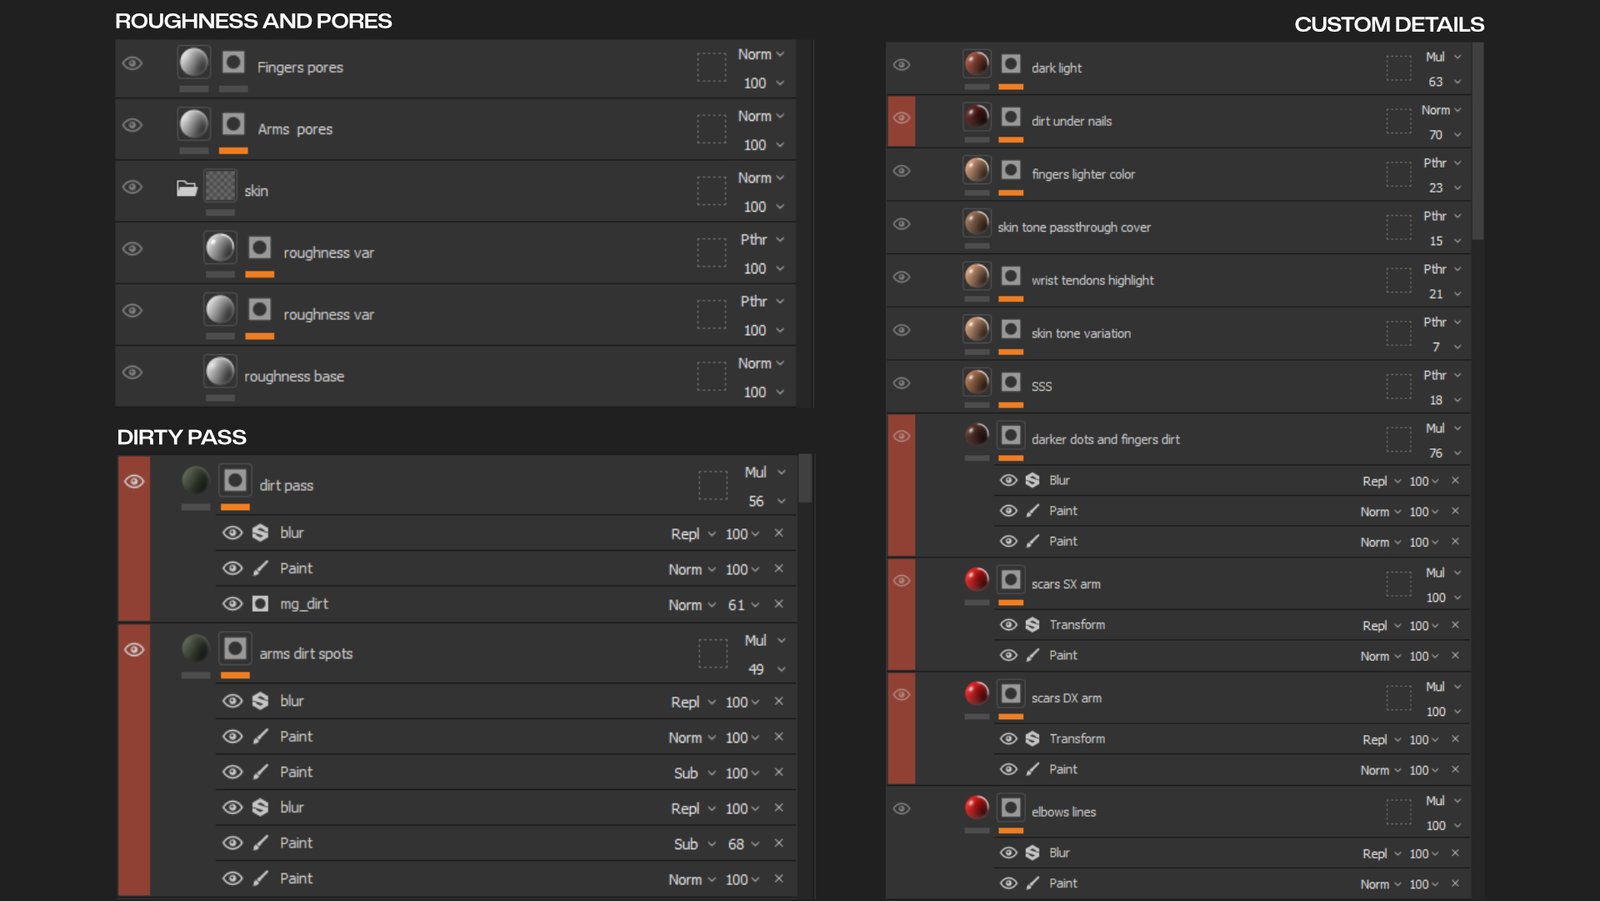
Common details
The layers shared by both skin tones: roughness variation, added pores and a dirt pass. Breaking the symmetry with custom details is what makes skin believable, and above all interesting.
FINAL RESULT
Both variants side by side. Same layer stack, same detail passes, two different results.